

Kit Contents
The iBR Flex Fuel controller kit comes with the FLX01 Flex Fuel Controller, FLX01 Plug-and-Play harness, Continental Flex Fuel Sensor with mounting bracket and hardware for mounting the FLX01 to the fuse box cover. It also comes with fuel lines for both the FA and EJ engines in 2008 to 2021 vehicles. See image for contents as it comes in the kit.
A quick note about the images in here….. This is our test mule, the car we put miles on to test our products. It is far from a garage queen and doesn’t get the level of cleaning and attention it probably deserves. Bare with us when we take pictures of our well used/abused/loved car. We are out there driving it and using it just like you. Maybe the guy in the red WRX that waves back will be one of us!


Please Read
·······
Please Read ·······
Before Installation the Engine Grounding Must Be Inspected
While this bulletin specifically applies to the 2015+ WRX it is a good idea for grounds to be checked on all other models as well.


There are two ground straps that must be inspected and repaired before installation of aftermarket electronics like the FLX01. The first is on the driver’s side and attaches to the J-Pipe. The second is on the passenger’s side and attaches to the engine. If you have an aftermarket J-Pipe then the ground strap must also be relocated to the engine. Both ground straps must be in good condition and not excessively corroded.
If this is not done the flex fuel sensor and your fuel will become the ground path. This can be very dangerous and damage various electronics. We are not responsible for any damage done due to an improperly grounded engine.
Your car will thank you for this.

Required Tools
The tools for this job are quite simple.
10mm Socket and ratchet
1/4” Diameter Drill Bit (and drill)
Cutting Pliers (only needed if used on iBR Intake Manifold)
Zip Ties
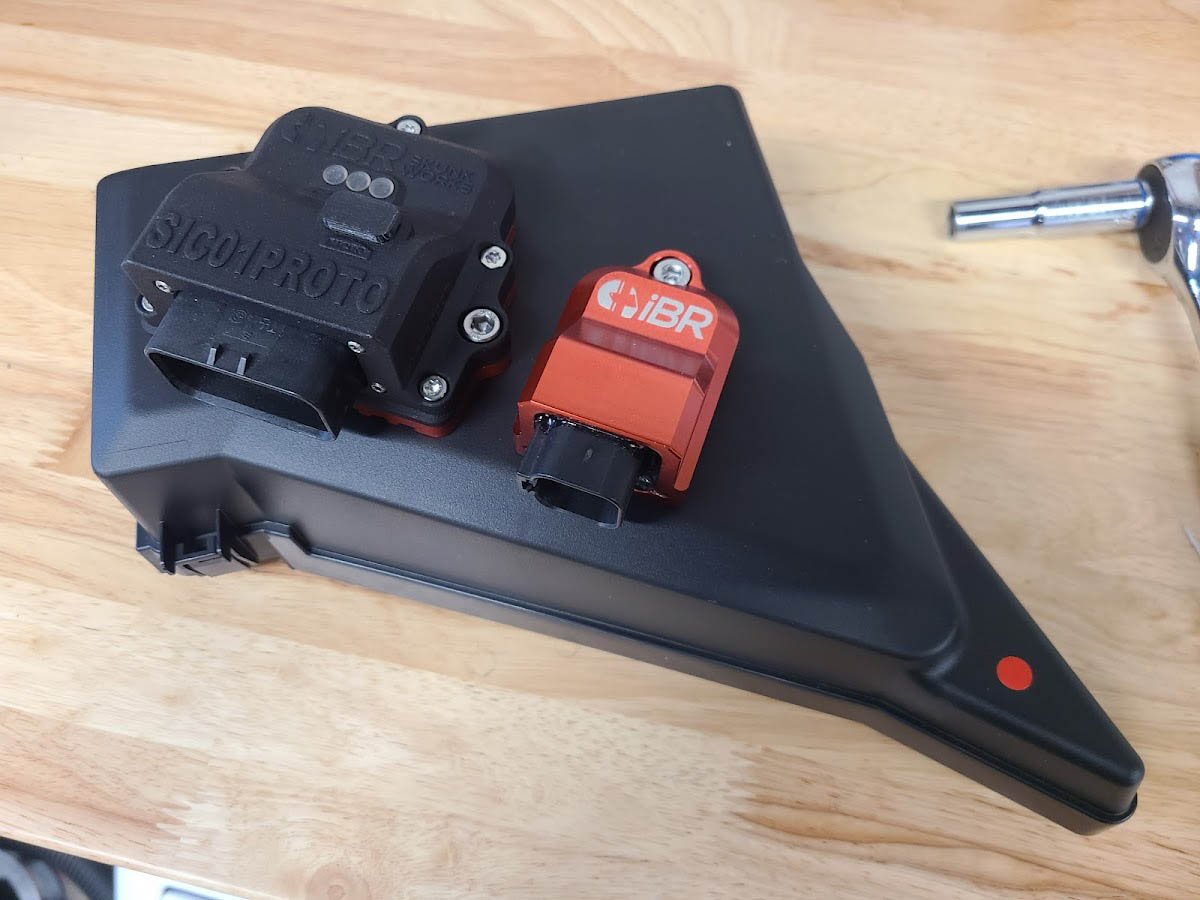
Mounting FLX01 to Fuse Box Cover
We found the best place to mount this is directly to the top of the fuse box cover. This makes it easy to install/uninstall, easy to see the LEDs and the wiring seems to tuck in and run nicely. Also the cover is ~$12 from your local Subaru dealer so we don’t feel bad about putting a couple holes in it. We did this on a work bench to make life easier. You can also use double sided tape to mount the controller to the top of the box but make sure it is designed for the heat normally seen in engine bays.
Line Up FLX01 on Fuse Box Cover
Mark Hole Location
Drill Hole
Bolt FLX01 to Fuse Box Cover
Use Sealing Washer under the provided nut to ensure everything is still water resistant

Wiring Installation
STEP 1: Depressurize Fuel System
Open up the fuse box cover and remove the fuel pump fuse. Start the car and let the engine run until it it sputters and dies. This will ensure you have removed as much residual fuel pressure in the system as possible.

STEP 2: Disconnect Power
Once you have depressurized the fuel system go ahead and remove the battery from the engine bay. You will need access to the lower fuse box bolts to install the sensor.
This requires a 10mm socket and ratchet. You could also use a 10mm wrench.

STEP 3: Mount Flex Fuel Sensor
Use the front lower bolt on the fuse box to mount the flex fuel sensor bracket. Its reasonably easy to just slip the bracket under the fuse box mount but you can also loosen the other two mounting bolts on the fuse box to help make some space.


STEP 4: Fuel Lines
We will now remove the factory fuel line that we will end up replacing with two of the fuel lines provided in the kit.
For the cars with the FA20DIT engine there is a quick disconnect fuel line going from the upper hard line at the firewall to the fuel line bracket mounted to the intake manifold on the drivers side. Remove this fuel line, it will not be reused. Install the longer line with quick disconnects on both ends between the fire wall connection and the drivers side port on the sensor. The shorter line with quick disconnects get installed between the sensor and the intake manifold mounted fuel line bracket. If you have the BRZ manifold kit on your car you can just run the shorter line directly to the HPFP. The image below shows the fuel line routing. (we don't have a standard fuel system on our test car so that second connection is not shown)
For the EJ cars there are a few different configurations that we are working on getting photos for. For the STi the sensor should be installed between the return connection on intake manifold fuel line bracket and the silver fuel pressure regulator. On the WRX the sensor gets installed between the the same lower connection on the intake manifold bracket and the lower small black fuel pulse damper that is mounted to the strut tower. Both the STi and WRX installs will use the shorter fuel line with two quick disconnects and the longer fuel line with only a single quick disconnect.


STEP 5: Wiring
First, reinstall the fuse box cover with the FLX01 controller mounted. There is a 6 Pin connector on the FLX harness that plugs directly into the controller. The seal on this connector comes pre-lubricated with a little bit of silicone, if this connector is ever difficult to remove and replace just add a little bit of silicone spray to the seals. This is common with the DT style connectors we used as they are designed to be very watertight.
The 3 Pin connector on the FLX harness then connects to the Flex Fuel Sensor where it is mounted towards the bottom of the fuse box.
Locate the TGV connector wires on the FLX01 Harness. This will connect inline with the drivers side TGV connector. If you are required due to emissions regulations to still have TGVs in place we have included the pass through wires to keep the TGV motors functional. This connector sends 5V ECU power to the FLX01 and also connects the analog output of the SIC01 to the TGV position sensor input. When your tune is enabled for flex fuel you will be able to see the ethanol content on your tuning device.


